Installig Proxmox VE on ZFS
By Aaron Colin 03/20/2025
This guide walks you through installing Proxmox VE on a Topton R1 Pro NAS with 2x 2.5G LAN ports from start to first boot, using ZFS in a mirror configuration on NVMe drives.
Why Use ZFS?
ZFS is a robust and feature-rich filesystem that offers data integrity, snapshot capabilities, and built-in redundancy. One of its key advantages is copy-on-write, which ensures that data is never overwritten in place, reducing the risk of corruption. Additionally, ZFS includes automatic checksumming to detect and correct data errors, making it highly reliable for long-term storage. The ability to take snapshots and rollbacks provides a quick way to restore data without requiring full backups, and its support for compression can help optimize storage usage.
Given the hardware constraints of this Mini PC, I have chosen to install Proxmox VE with ZFS in a RAID1 (mirror) configuration on the boot drive. This setup will host both the Proxmox system itself and all VMs/LXC containers. While this is not officially recommended by Proxmox developers, I am proceeding with this approach because I have a solid backup strategy in place. By leveraging Proxmox Backup Server, I can regularly back up my VMs and LXC containers, ensuring that I can recover from a catastrophic failure if necessary. This trade-off allows me to maximize my limited storage while maintaining redundancy and recoverability.
Prerequisites
- A Topton R1 Pro NAS with:
- 32GB RAM (64GB Optional)
- 2x NVMe drives
- USB flash drive (16GB or larger)
- A separate computer to download and burn the Proxmox ISO
- USB keyboard and monitor (for installation)
- Optionally:
- KVM to install remotely (no need for an additional monitor)
Step 1: Download the Proxmox VE ISO
- Visit the Proxmox download page.
- Download the latest Proxmox VE ISO Installer. 
Step 2: Create a Bootable USB Drive
Using Rufus (Windows)
- Download and install Rufus.
- Insert your USB flash drive.
- Select the Proxmox VE ISO.
- Set Partition scheme to
GPTand File system toFAT32. - Click Start to burn the ISO.
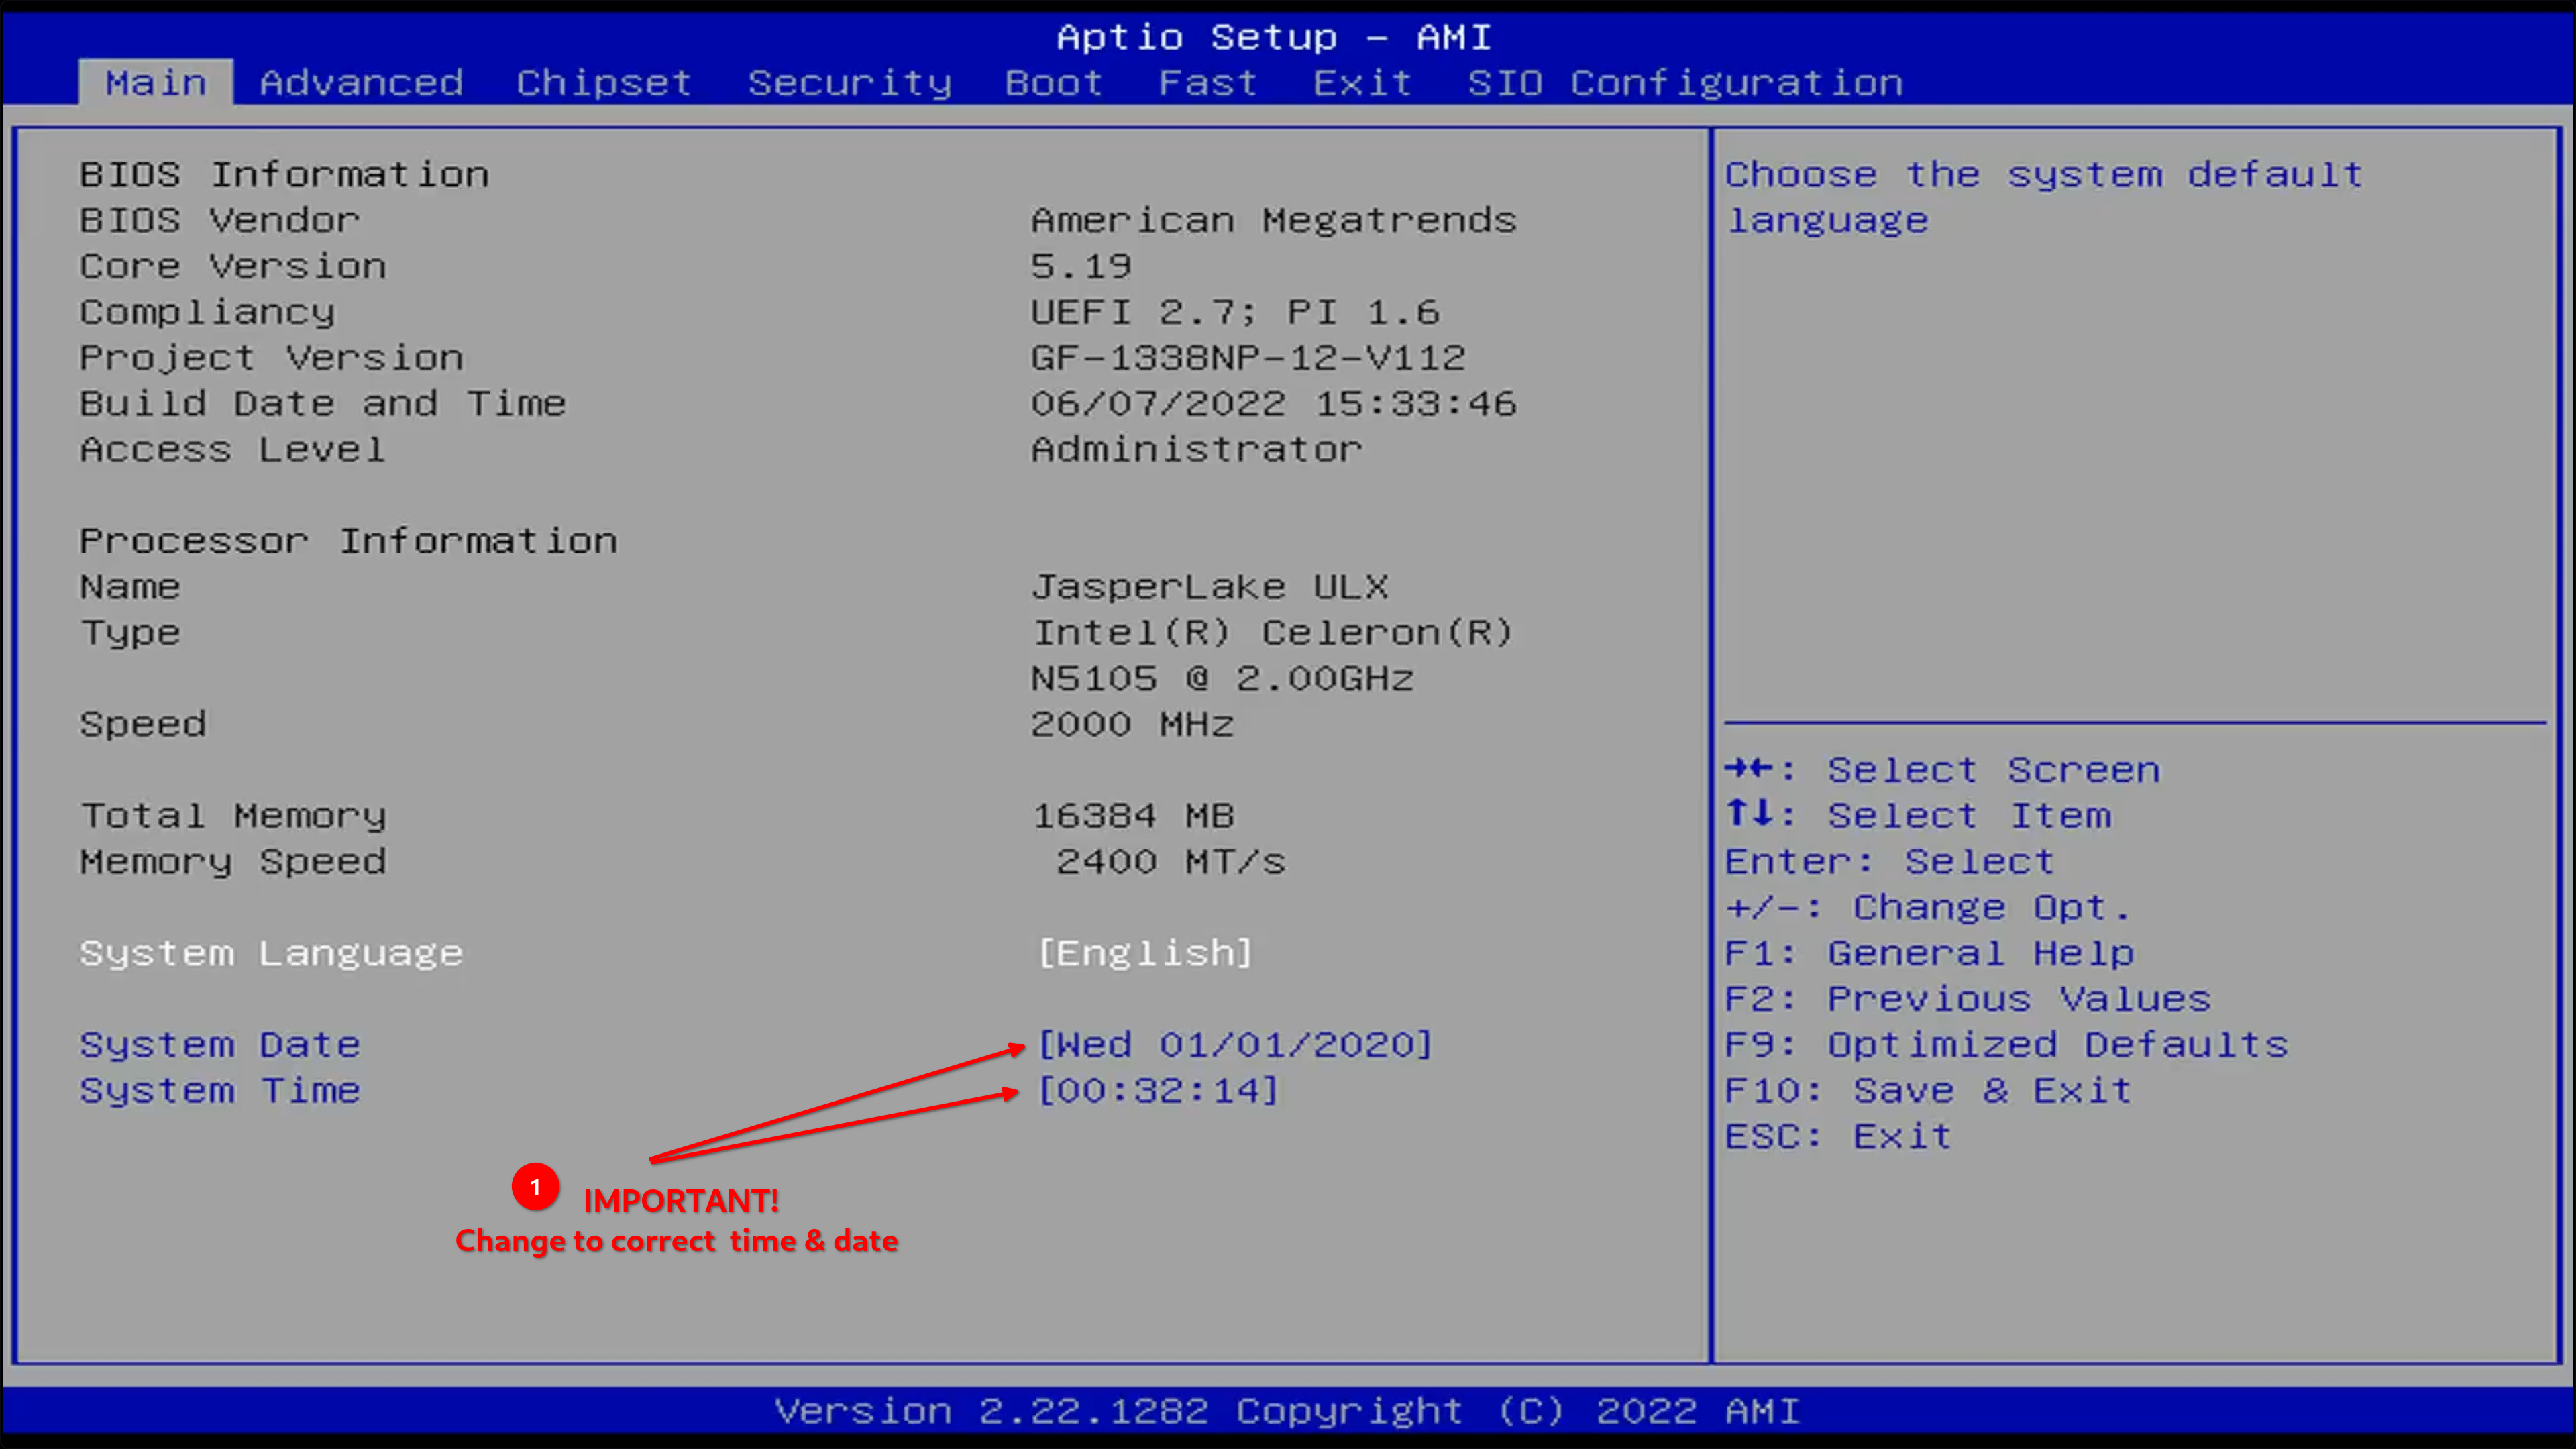
Step 3: Modify BIOS Settings
Entering BIOS
- Power on the Topton R1 Pro and press
DELto enter BIOS.
Required BIOS Changes
- Time and date: Set to the correct time and date.
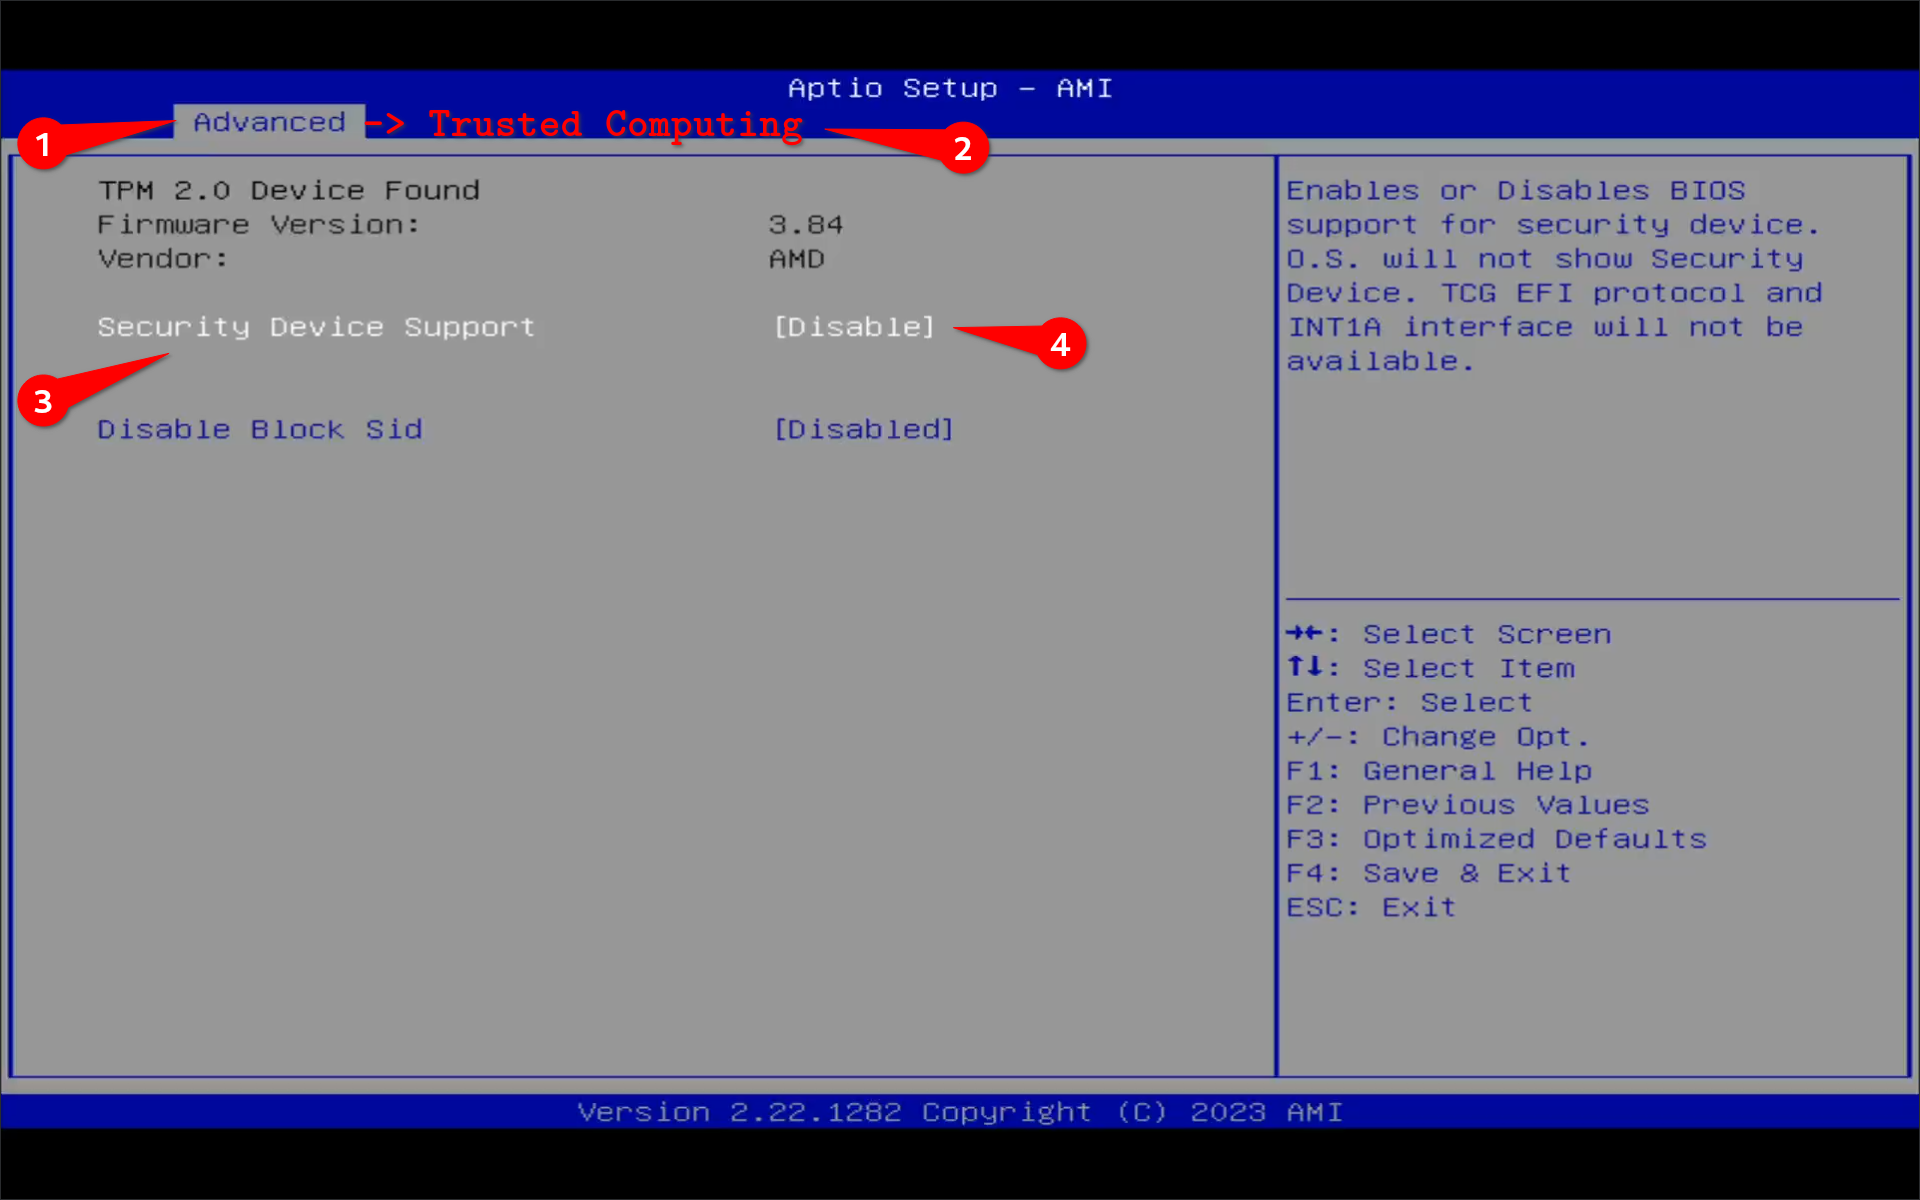
- TPM Module: set to
[Disable]
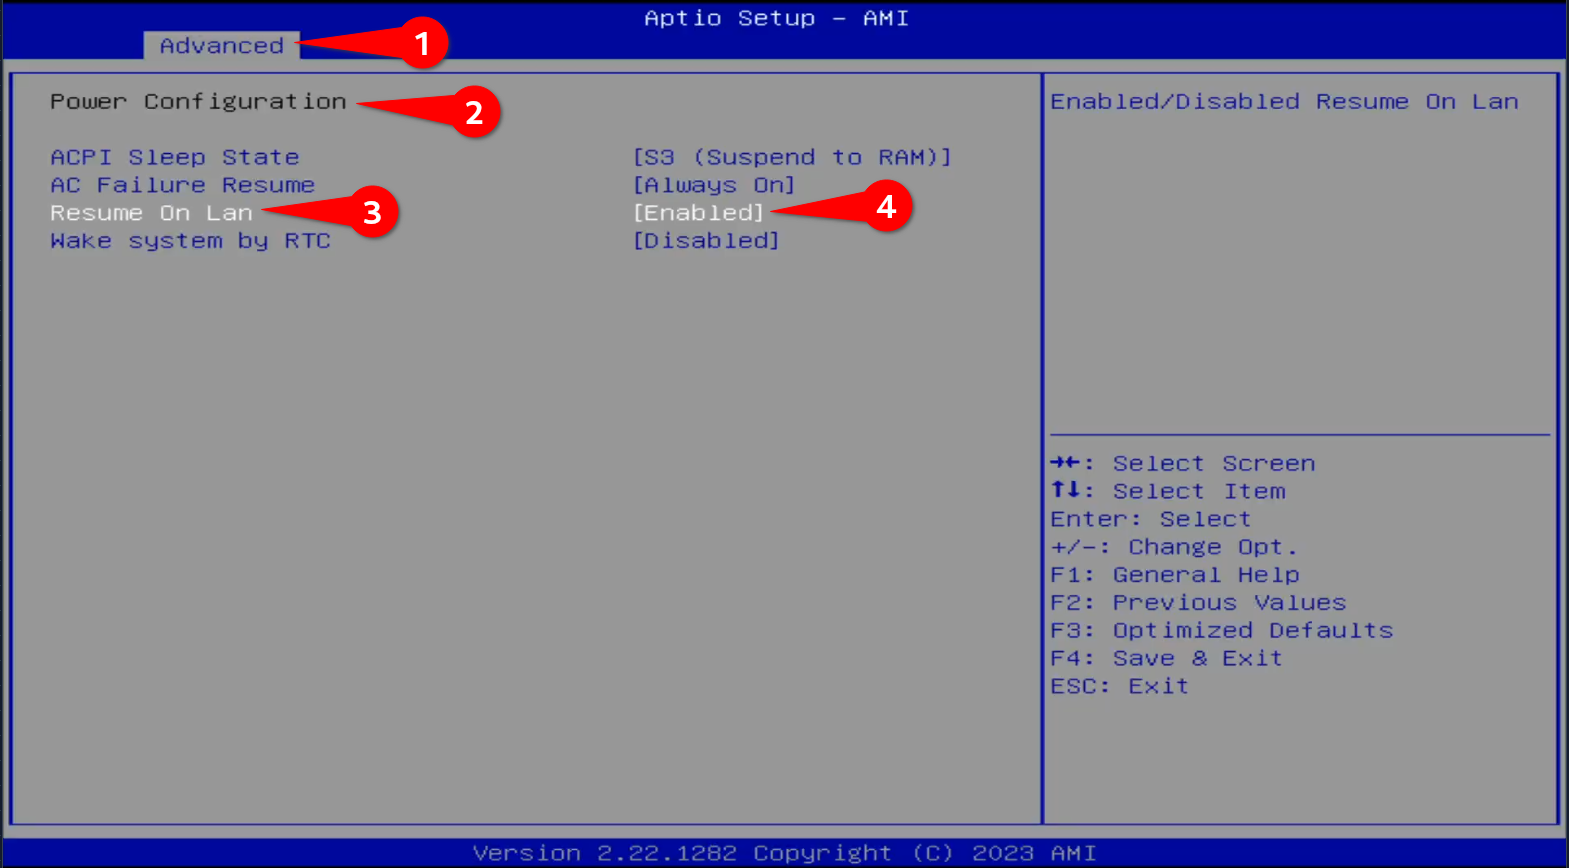
- Wake on Lan: Set to
[Enabled]
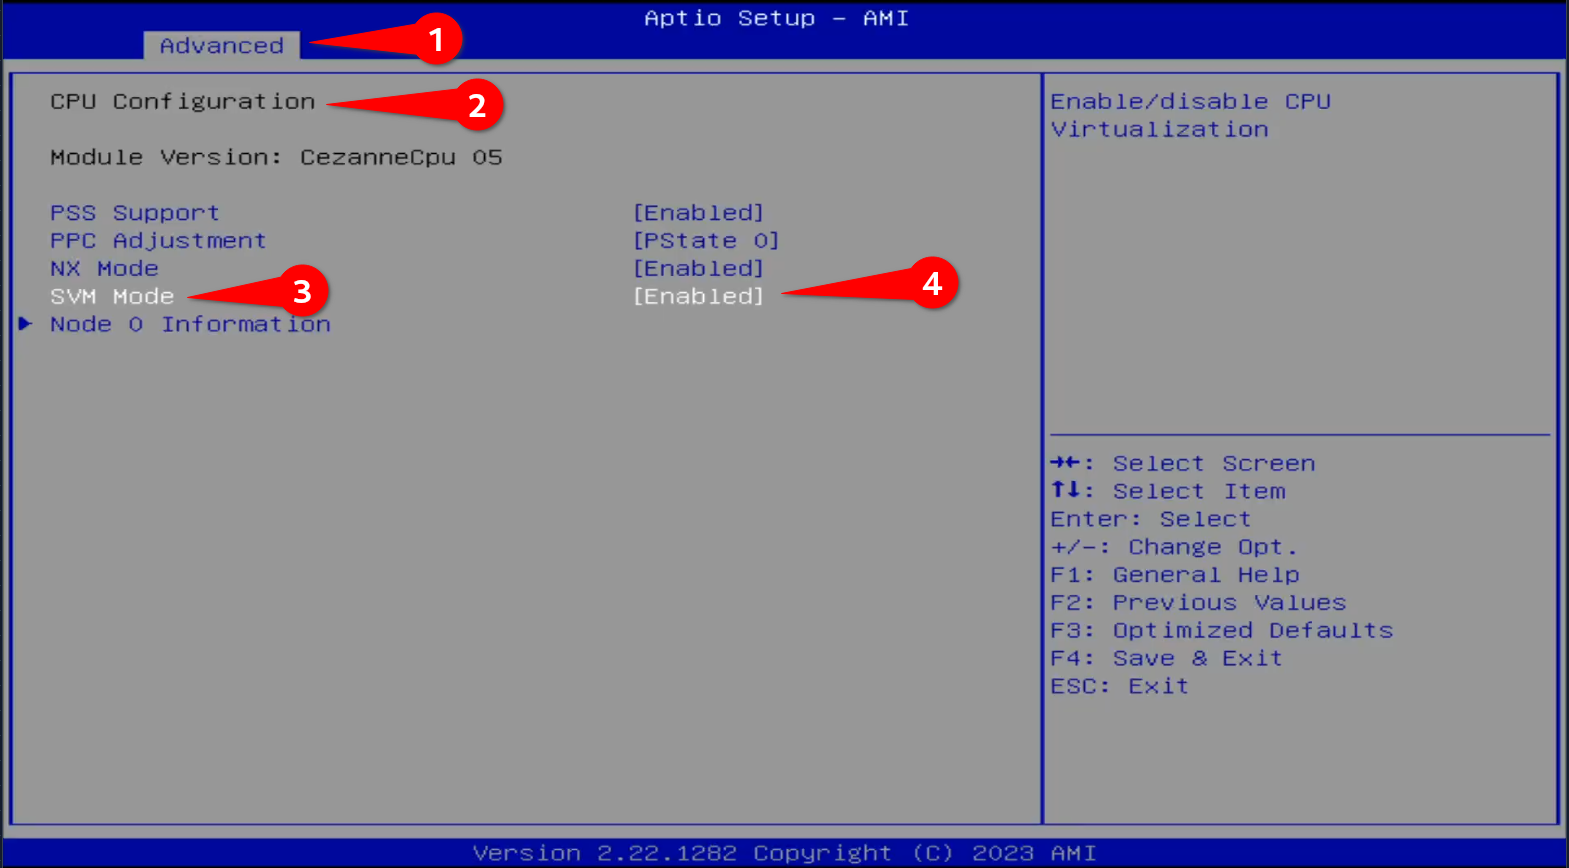
- AMD Virtualization SVM Mode: Set to
[Enabled]
- Boot Priority: Set to
NVMEas the first boot device.
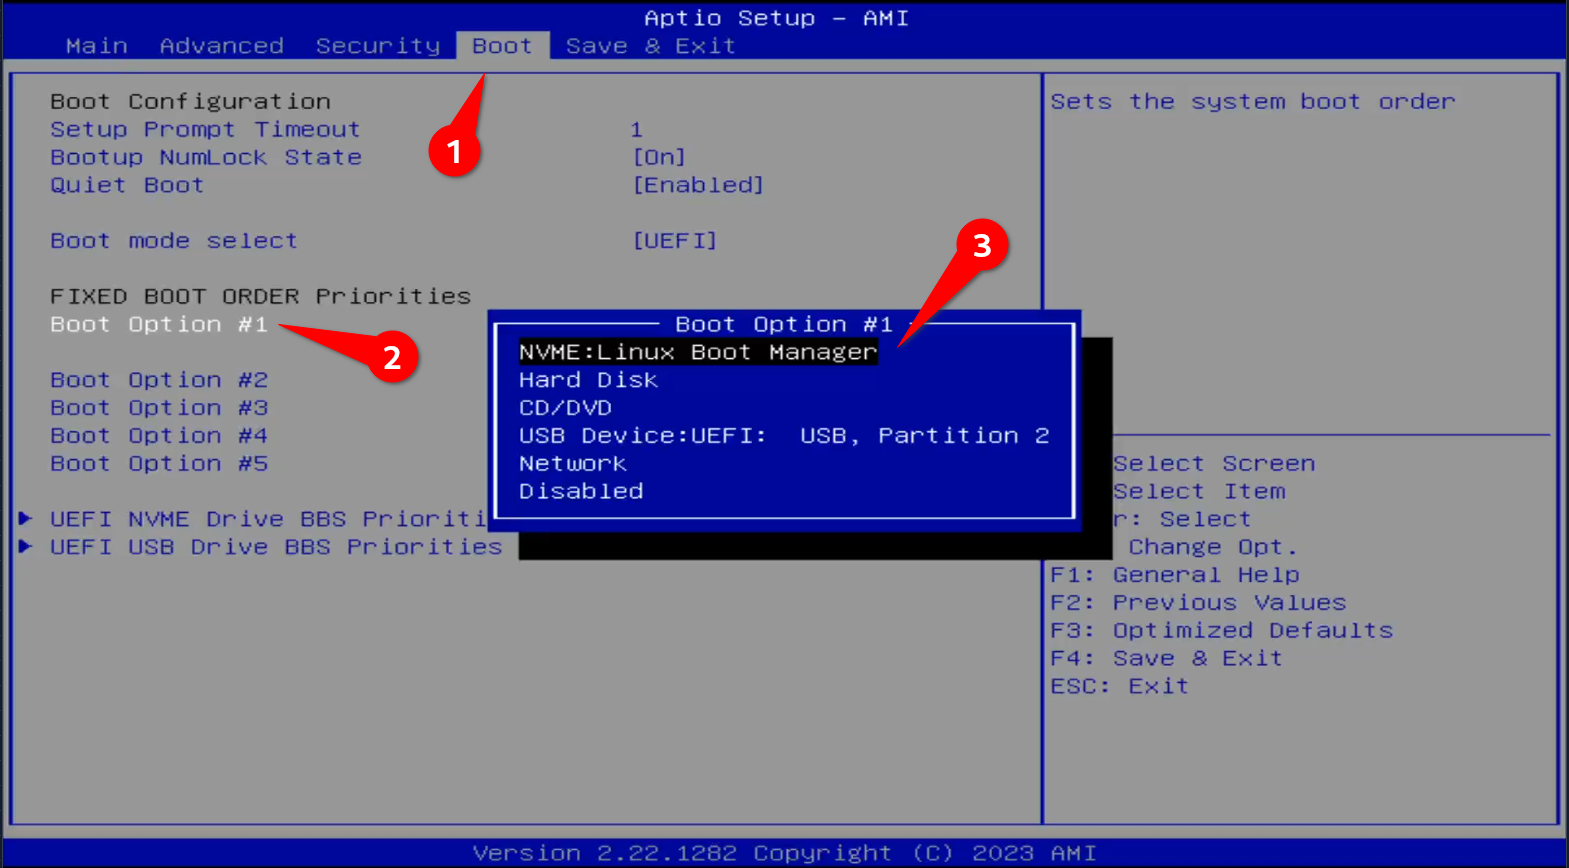
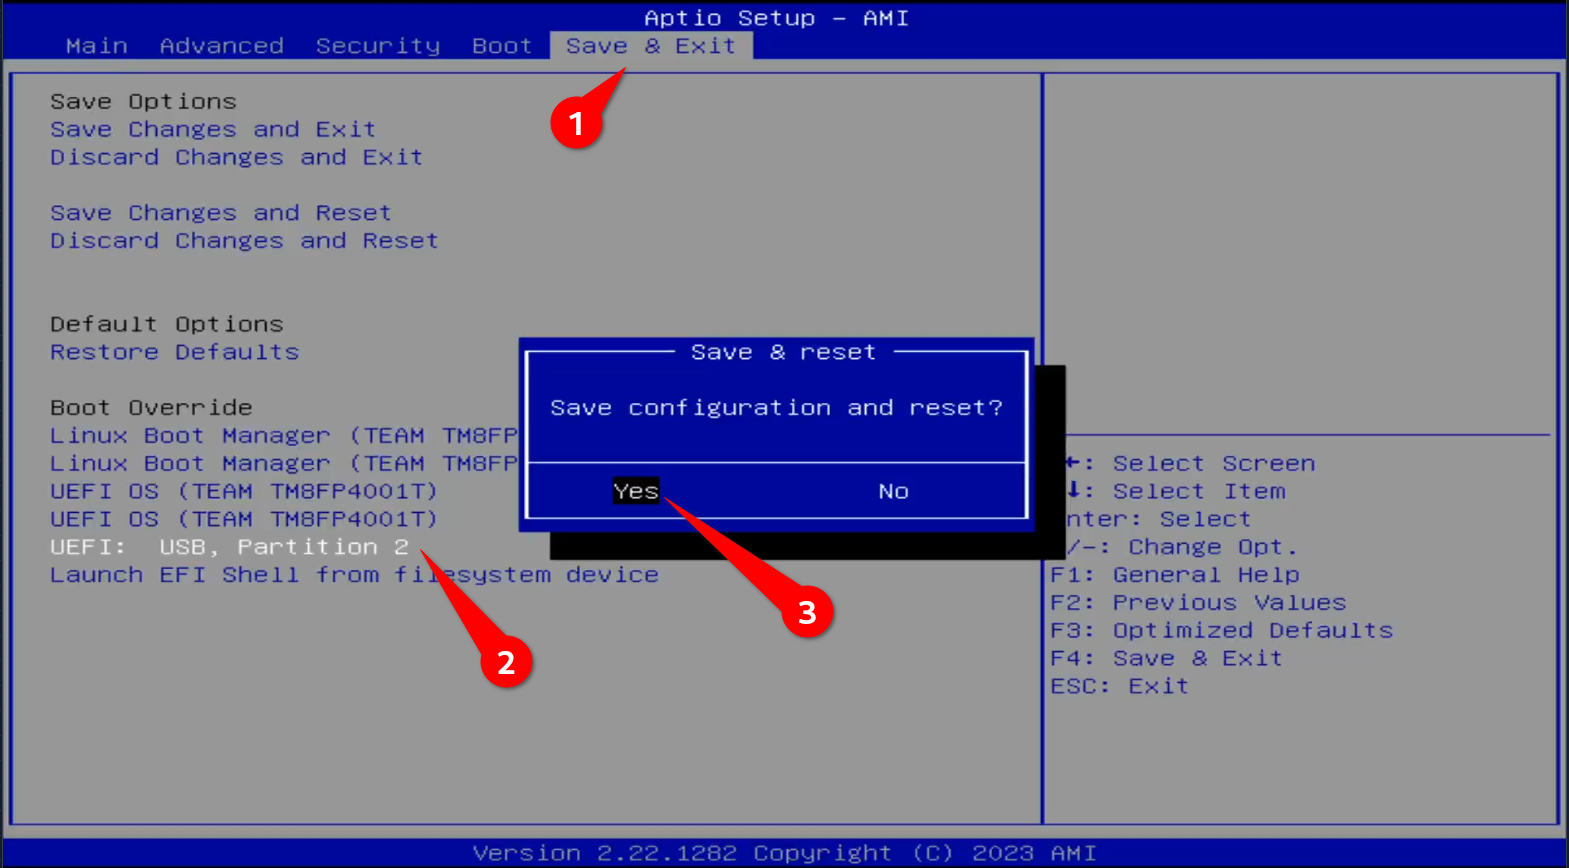
- Boot from USB (Override default boot option) Save changes and exit BIOS.
Step 4: Install Proxmox VE
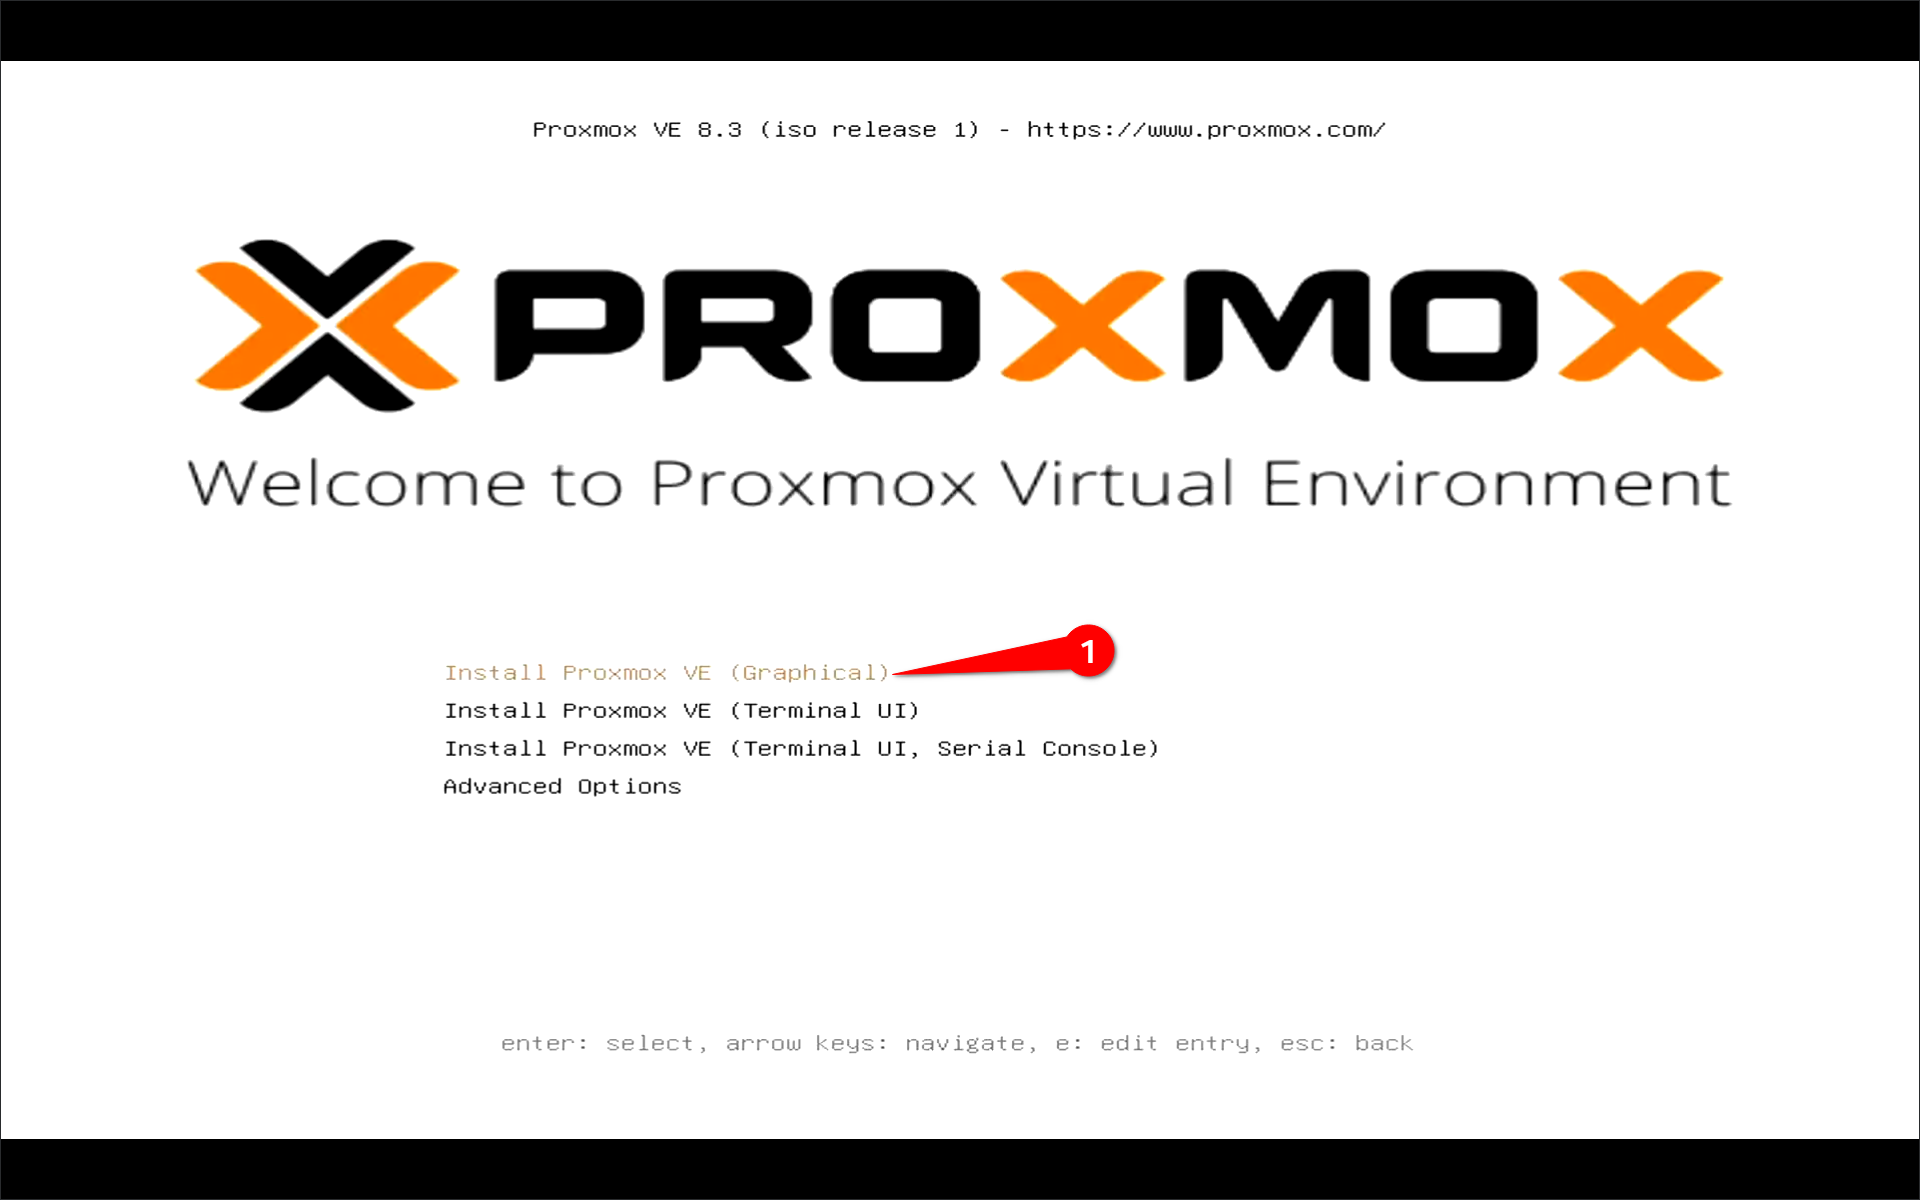
- In the Proxmox installer menu, select Install Proxmox VE.
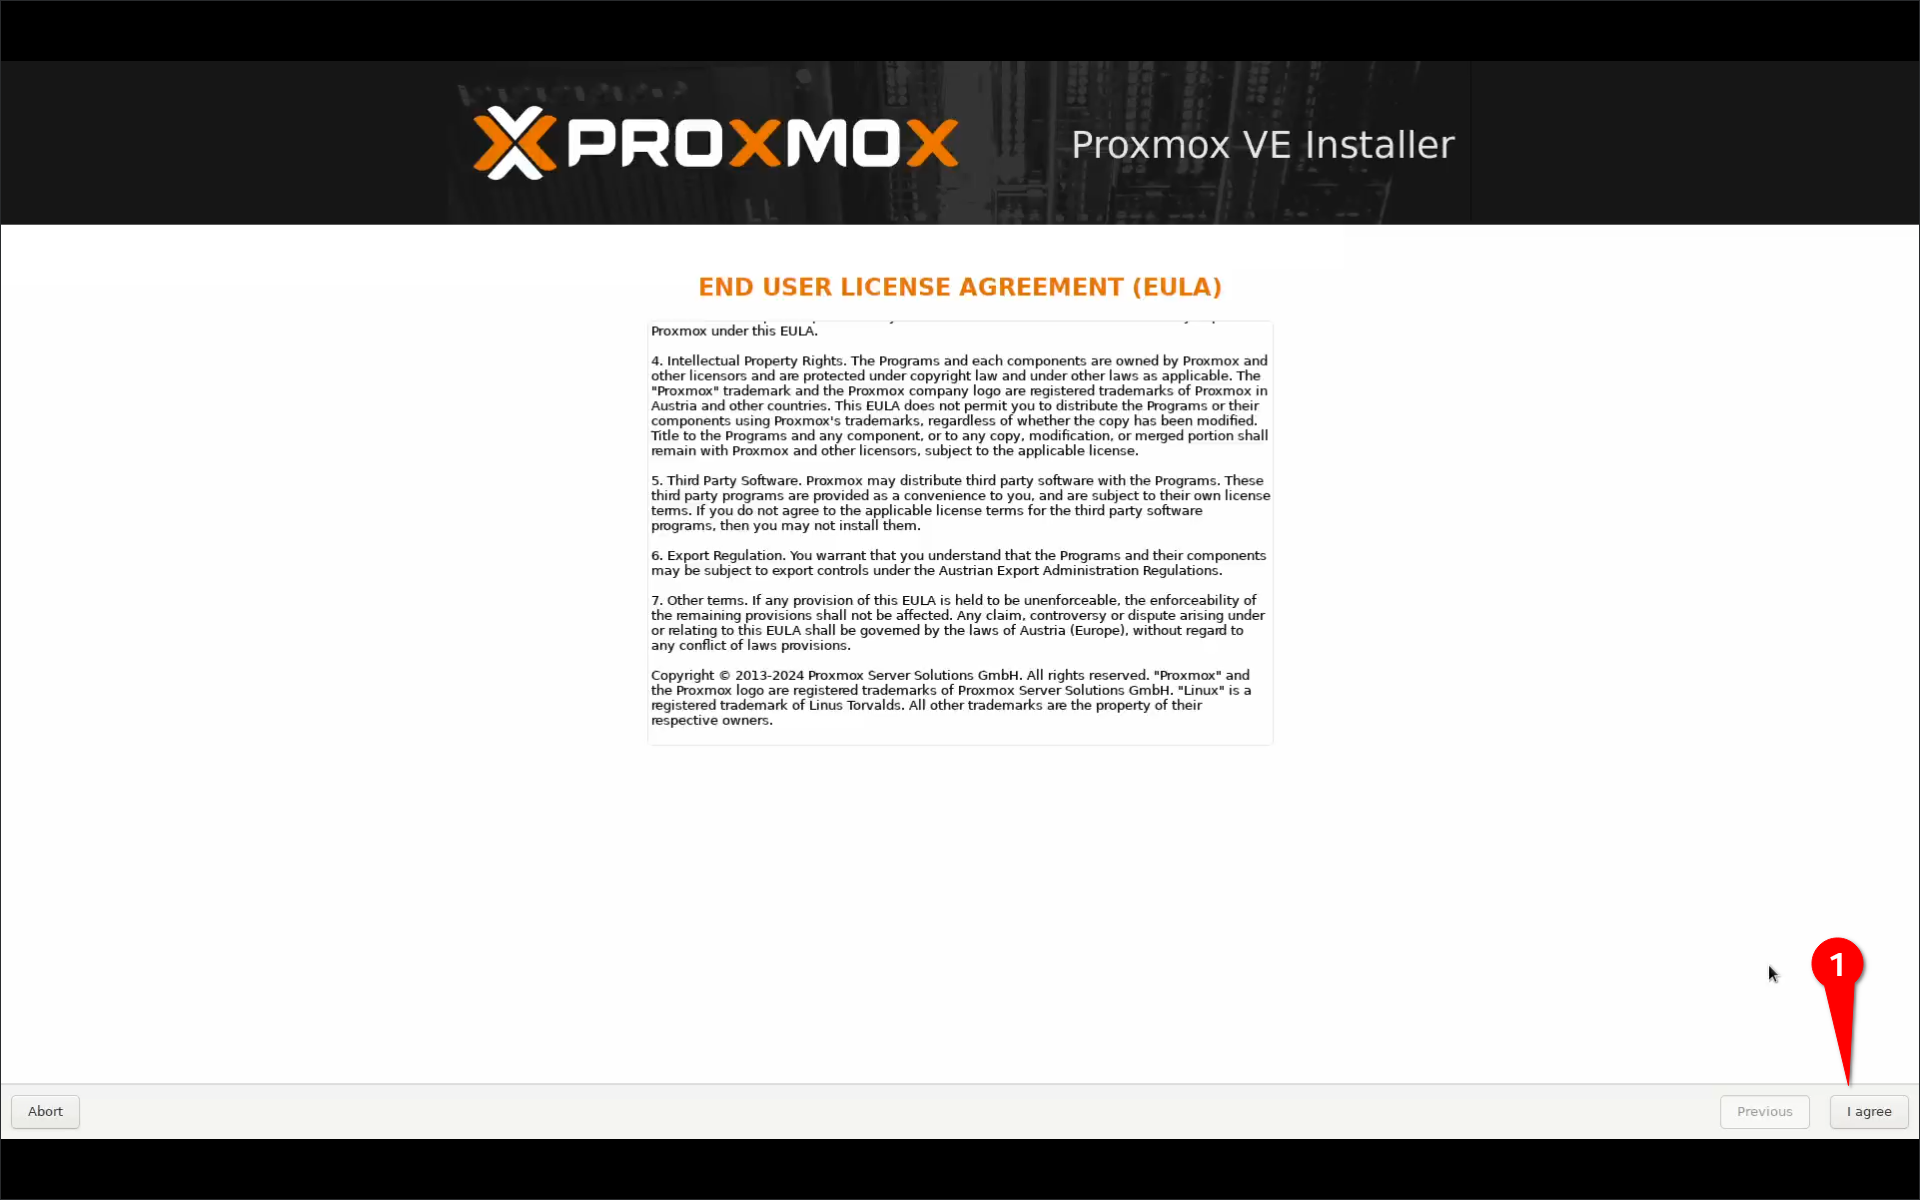
- Accept the EULA.
- Select the target disks for installation:
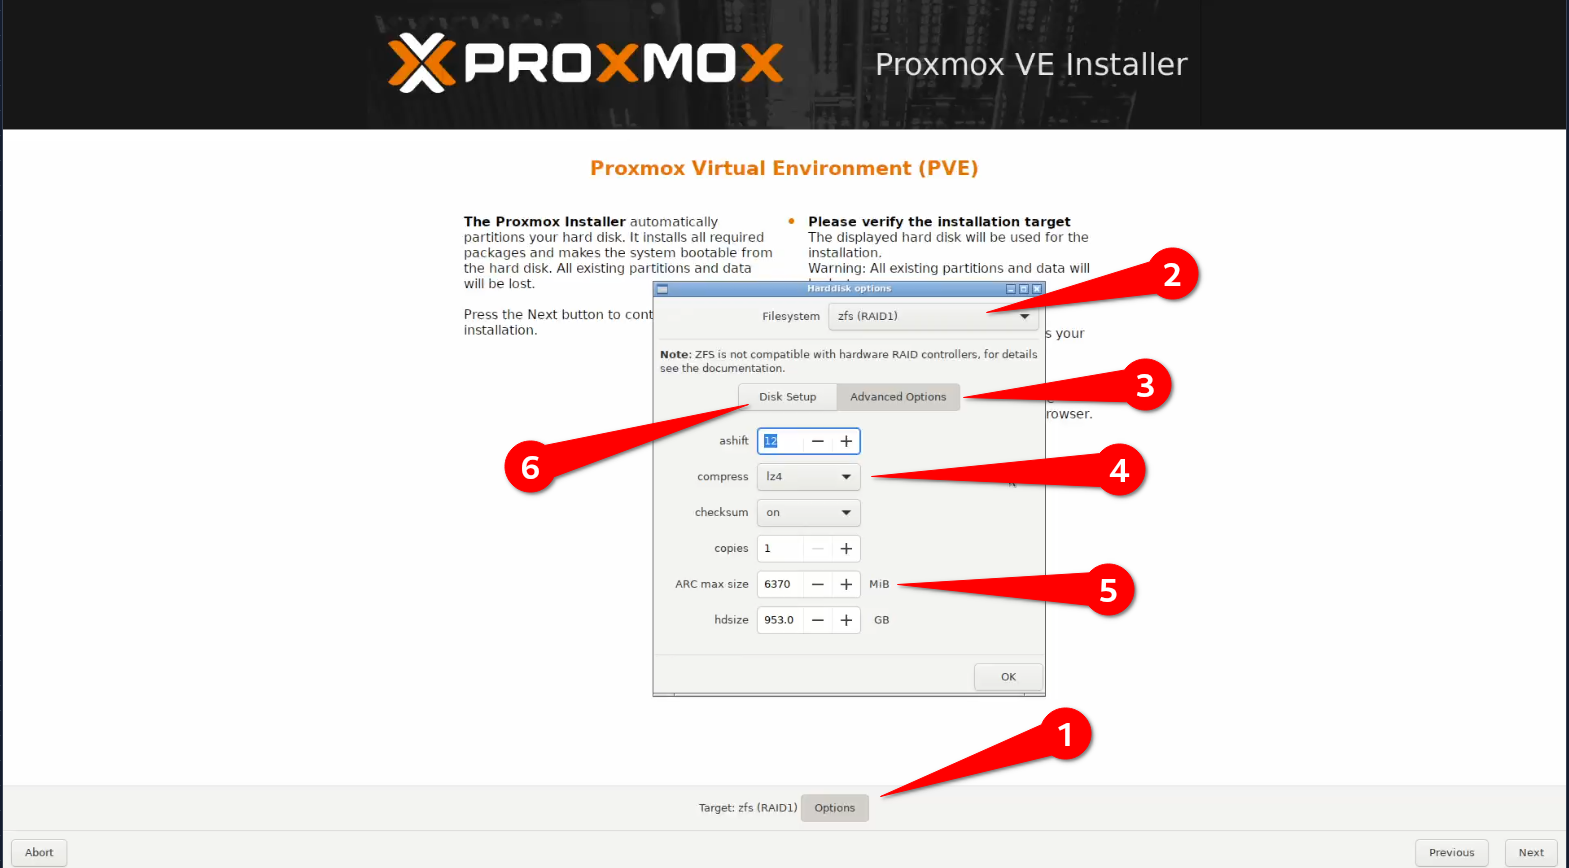
- Click Options button
- Select ZFS (RAID1) as Filesystem
- Click Advance options
- Select lz4 as compression option
- Change your ARC memory (Memory used for ZFS that will be taken out of your system). In my case I have 64GB of RAM so Proxmox automatically allocates abot 6GB for the ARC. Change according to your needs or memory installed in the system.
- Click Disk Setup
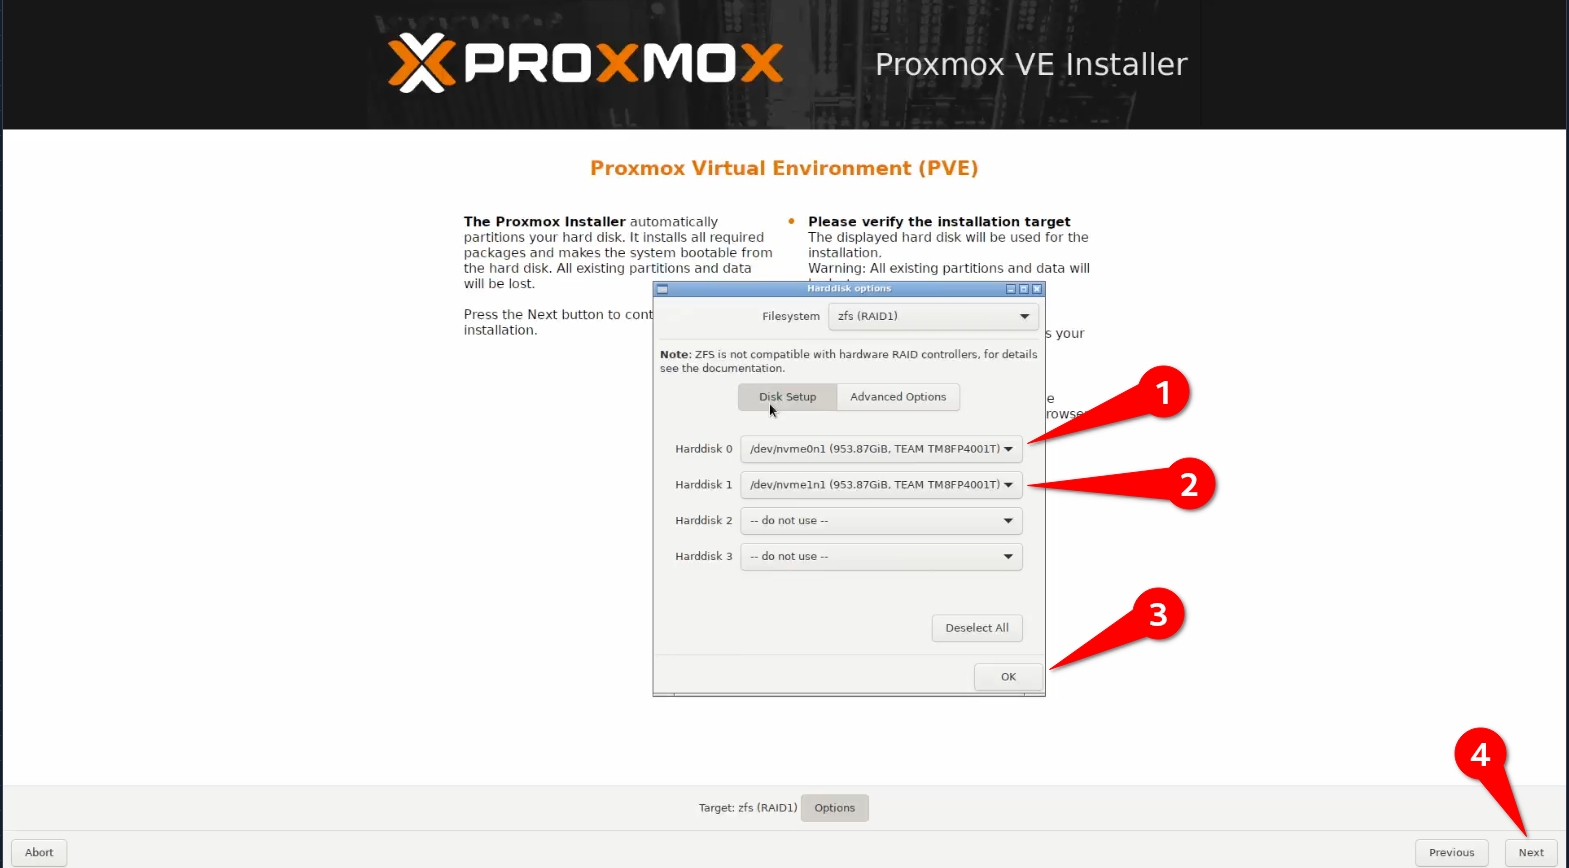
- Click Options, select ZFS (RAID1 Mirror), and choose both NVMe drives.
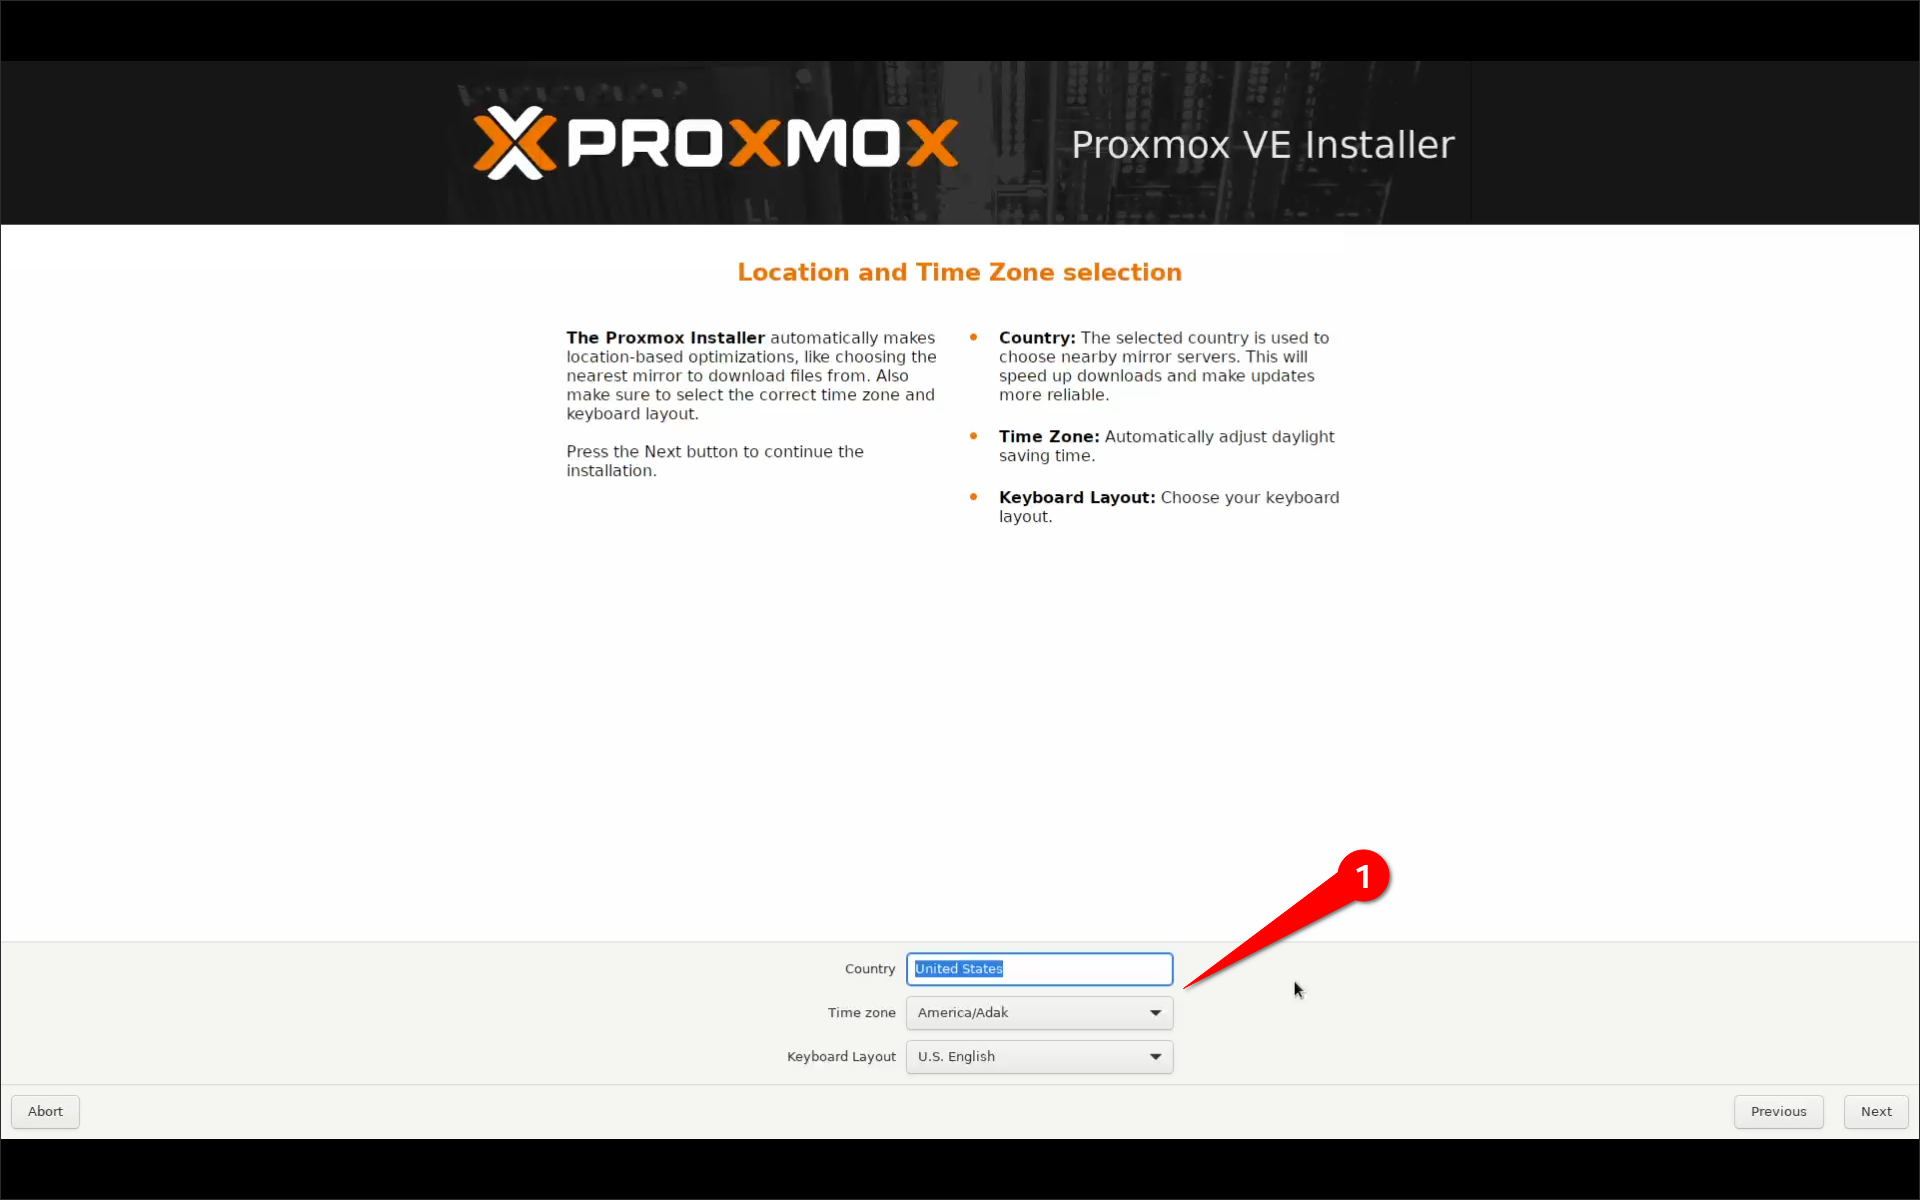
- Choose your country, timezone, and keyboard layout.
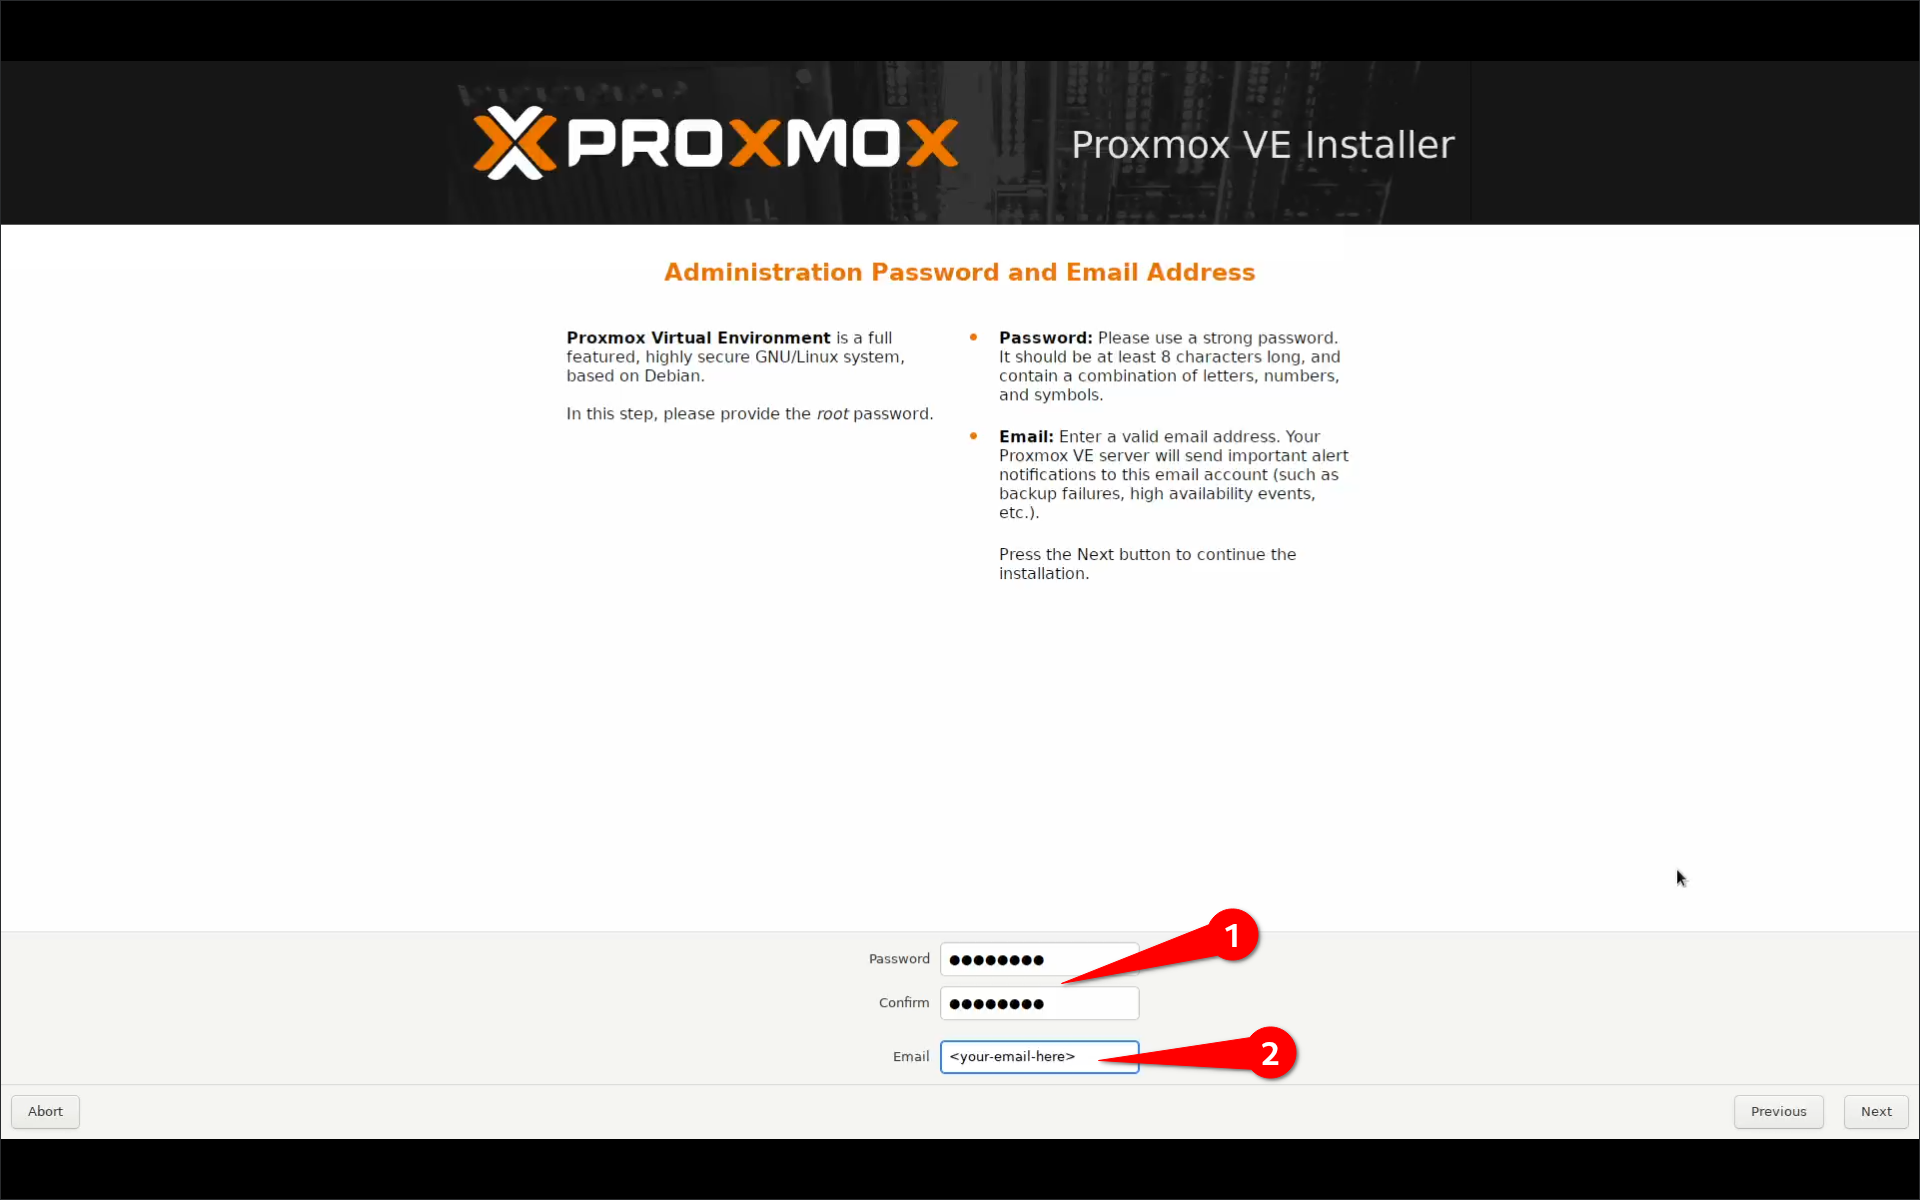
- Set a root password and provide a valid email address.
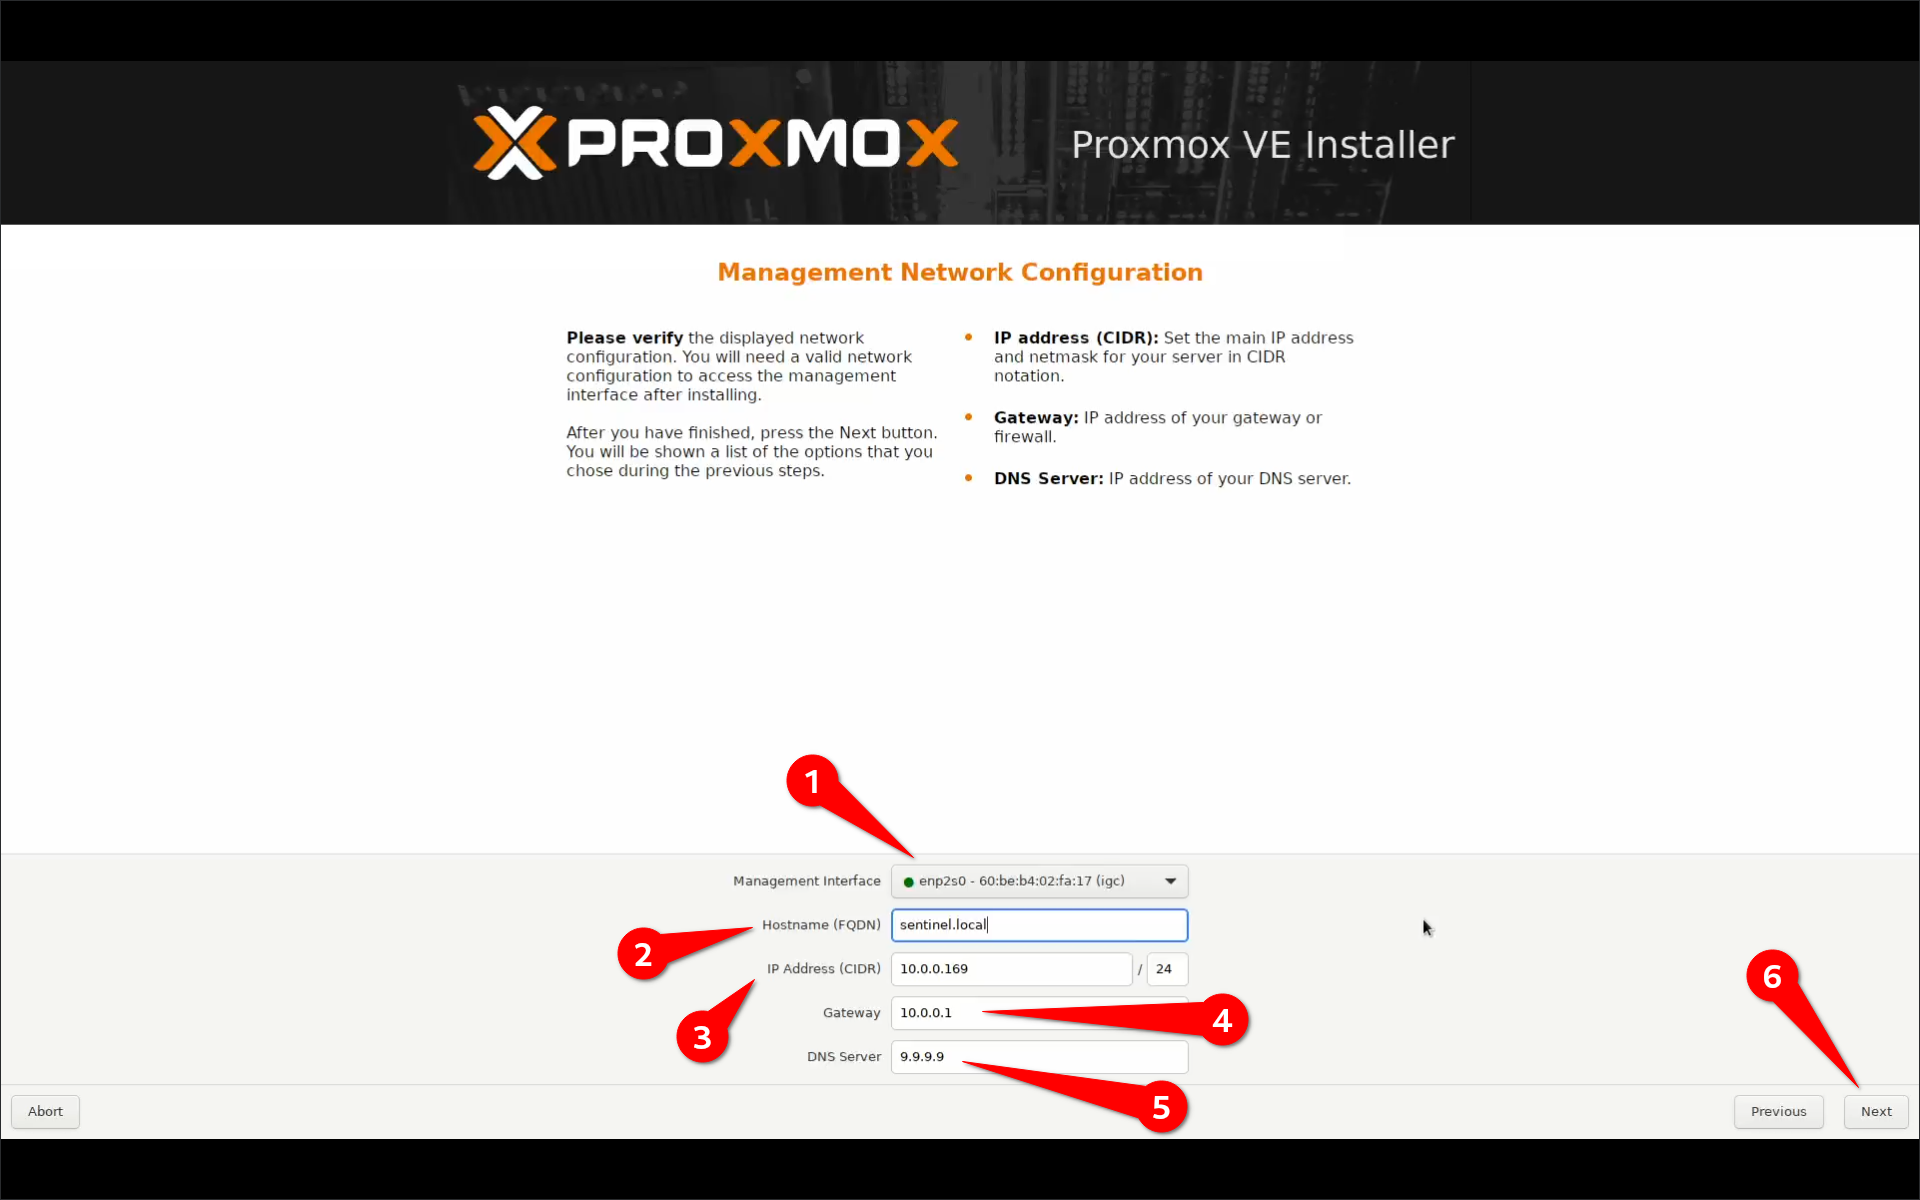
- Configure network settings:
- Choose the primary interface (e.g.,
enp2s0for Proxmox access). - Set a static IP (e.g.,
192.168.0.Xor10.0.0.X). - Set gateway and DNS server (Cloudflare
1.1.1.1, Google8.8.8.8, or Quad99.9.9.9). - Click Next and confirm settings.
- Choose the primary interface (e.g.,
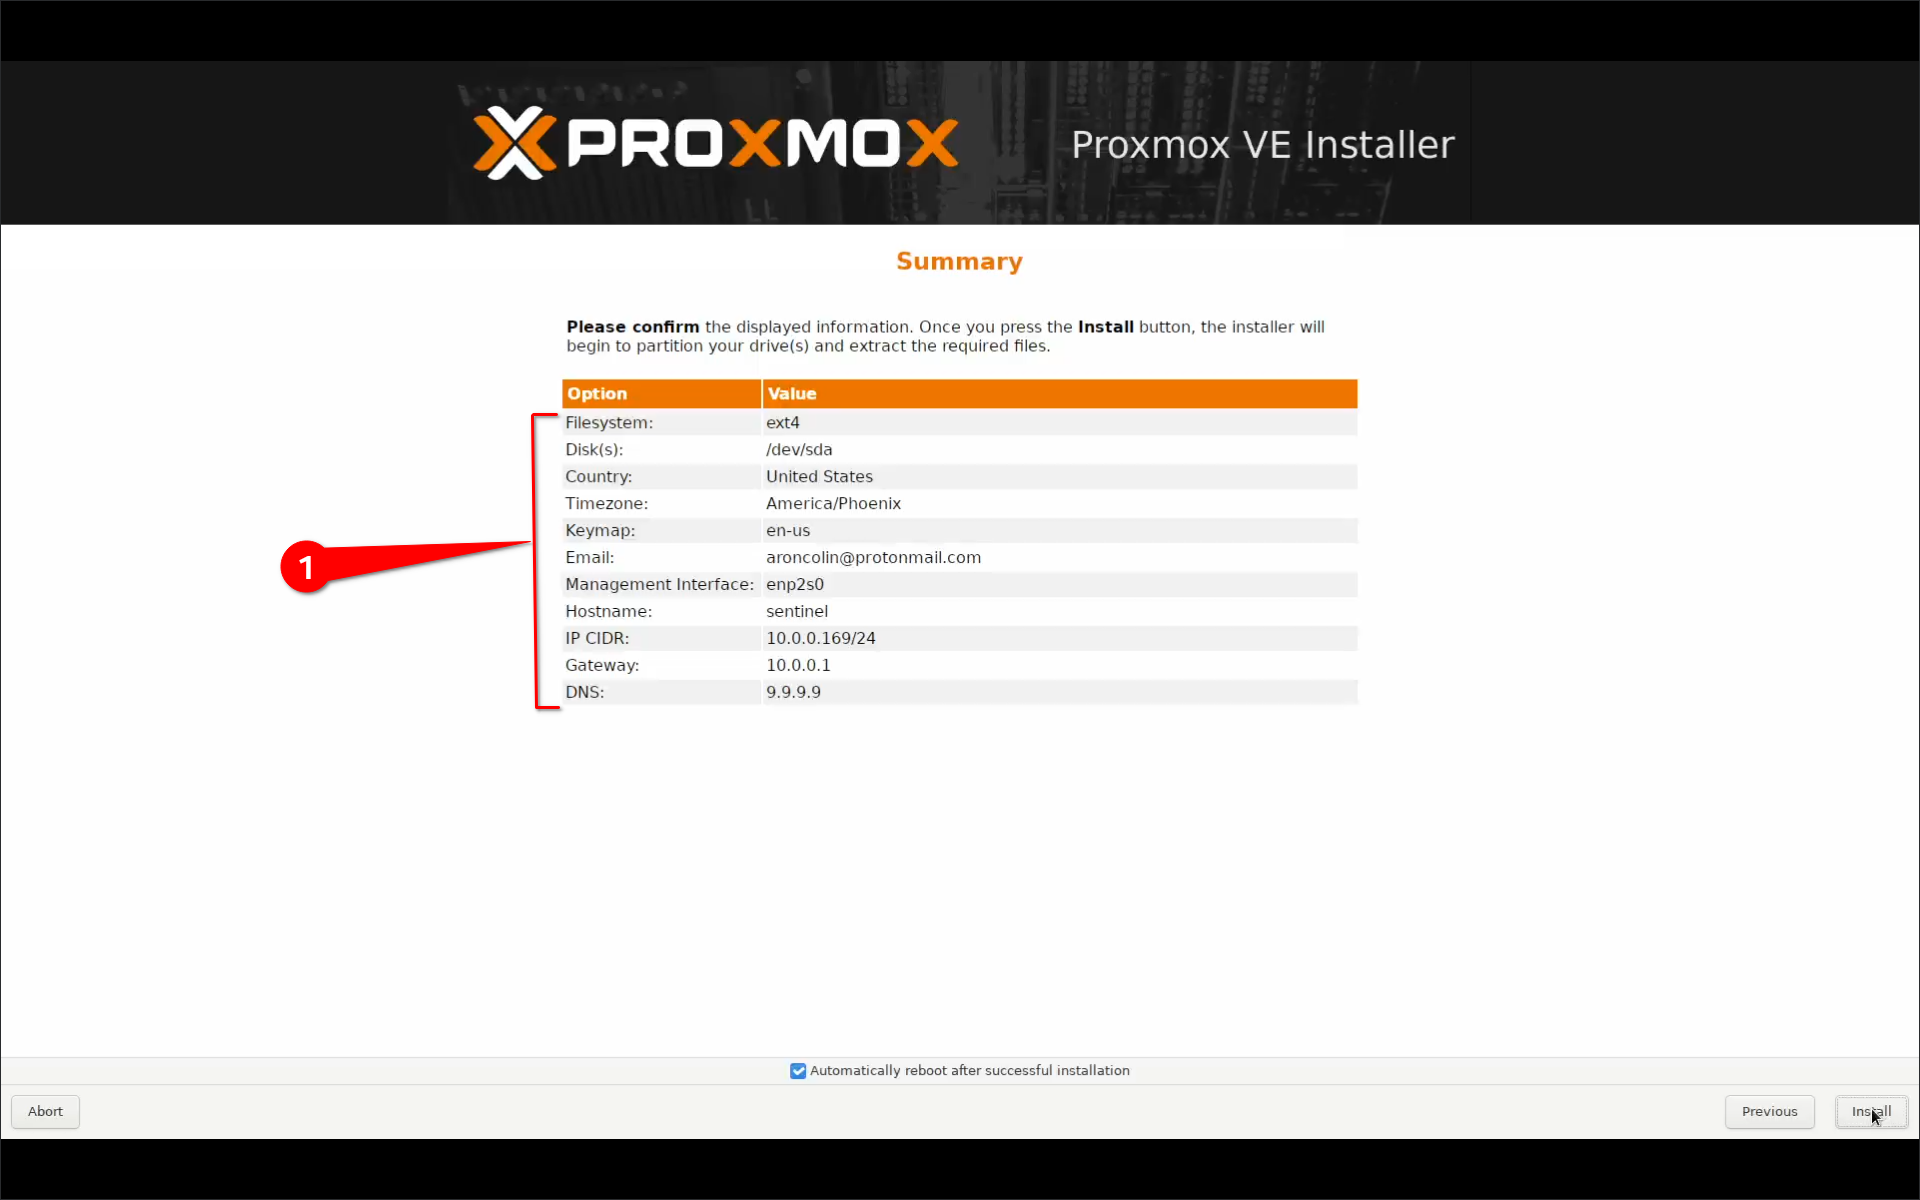
- Review the summary and ensure all options are correct, then click Install to start the installation.
Note
Make sure to Filesystem says ZFS and disks reflect the NVME disk you selected
- After installation completes, remove the USB drive and reboot. 
Step 5: First Boot & Web UI Access
-
After reboot, log in with
rootand your set password. -
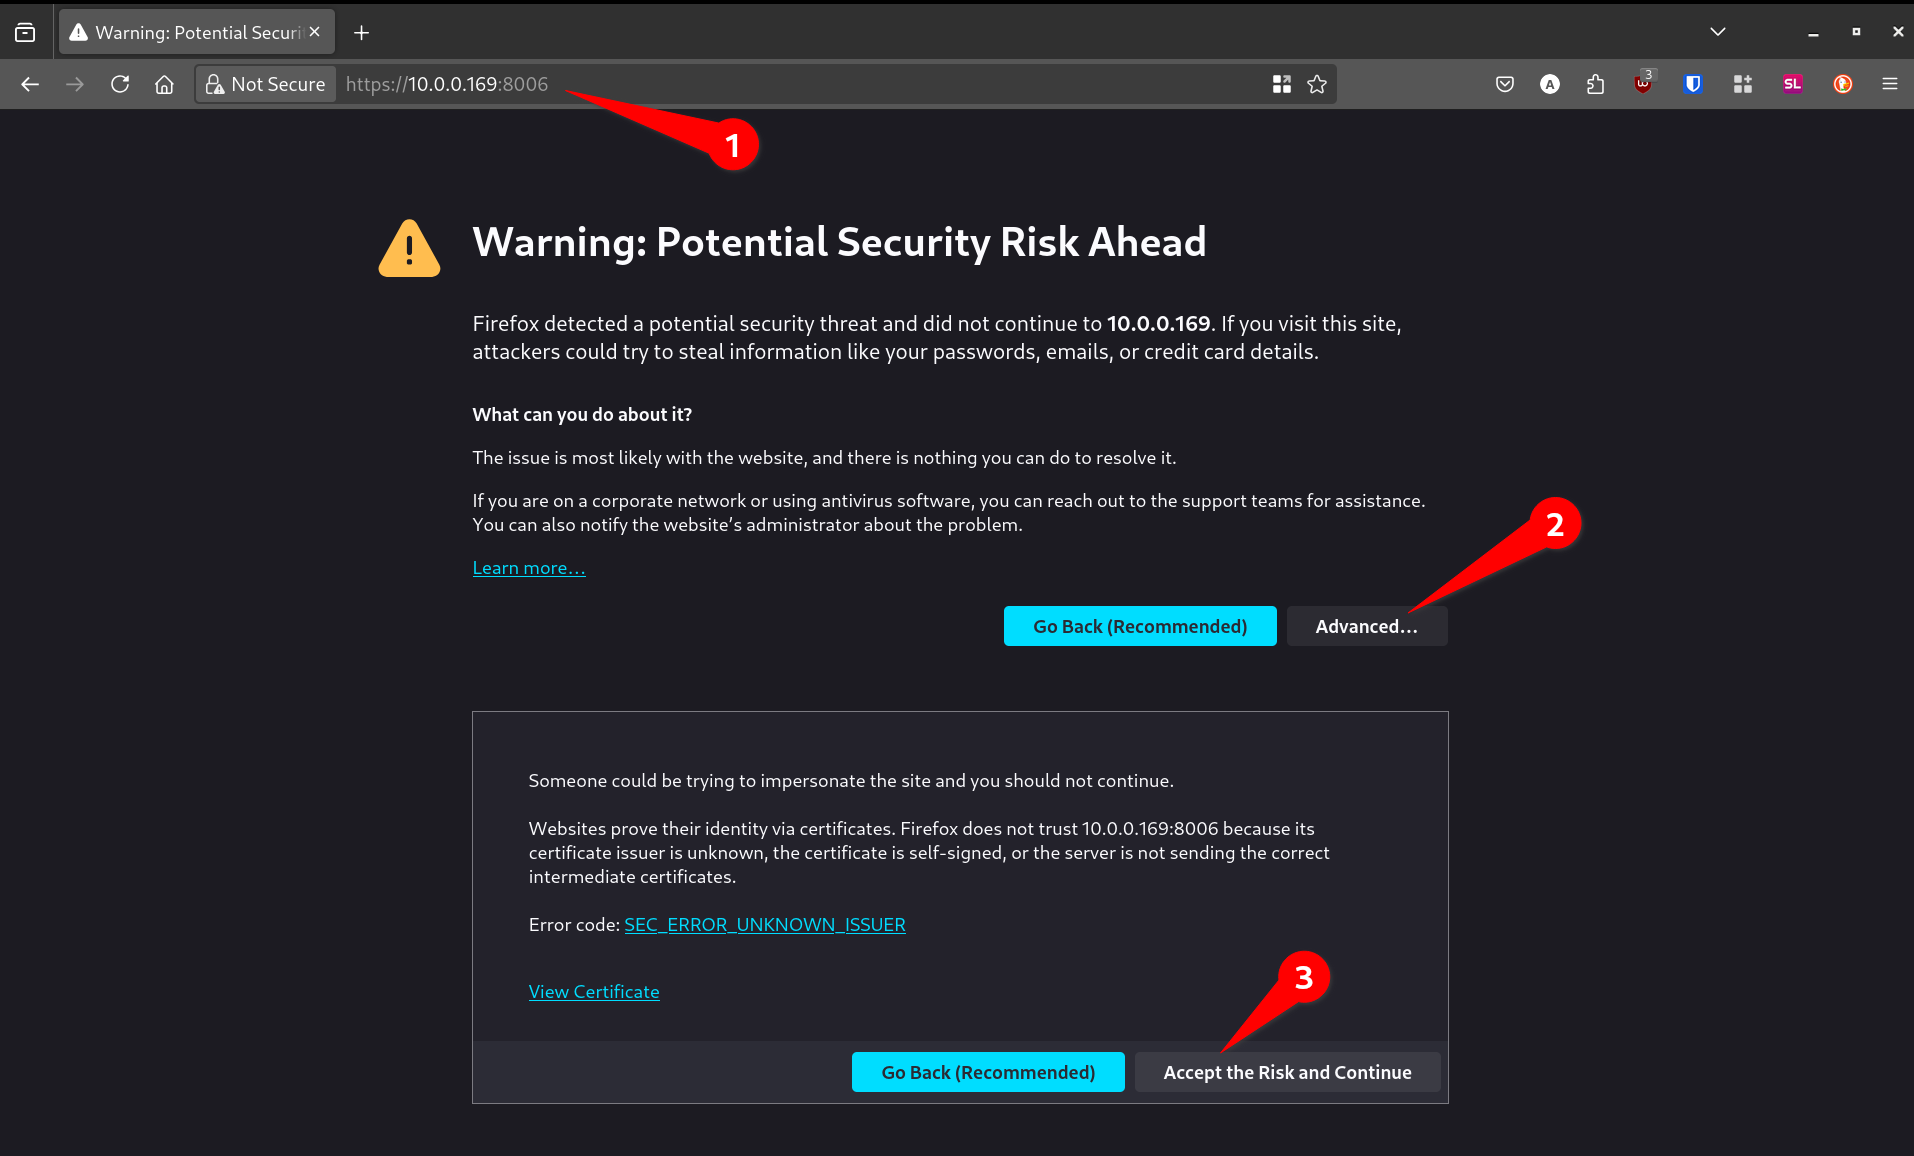
Find the Proxmox Web UI at:
https://<your-proxmox-ip>:8006
- Log in with:
- Username:
root - Password: (your configured password)
- Username:
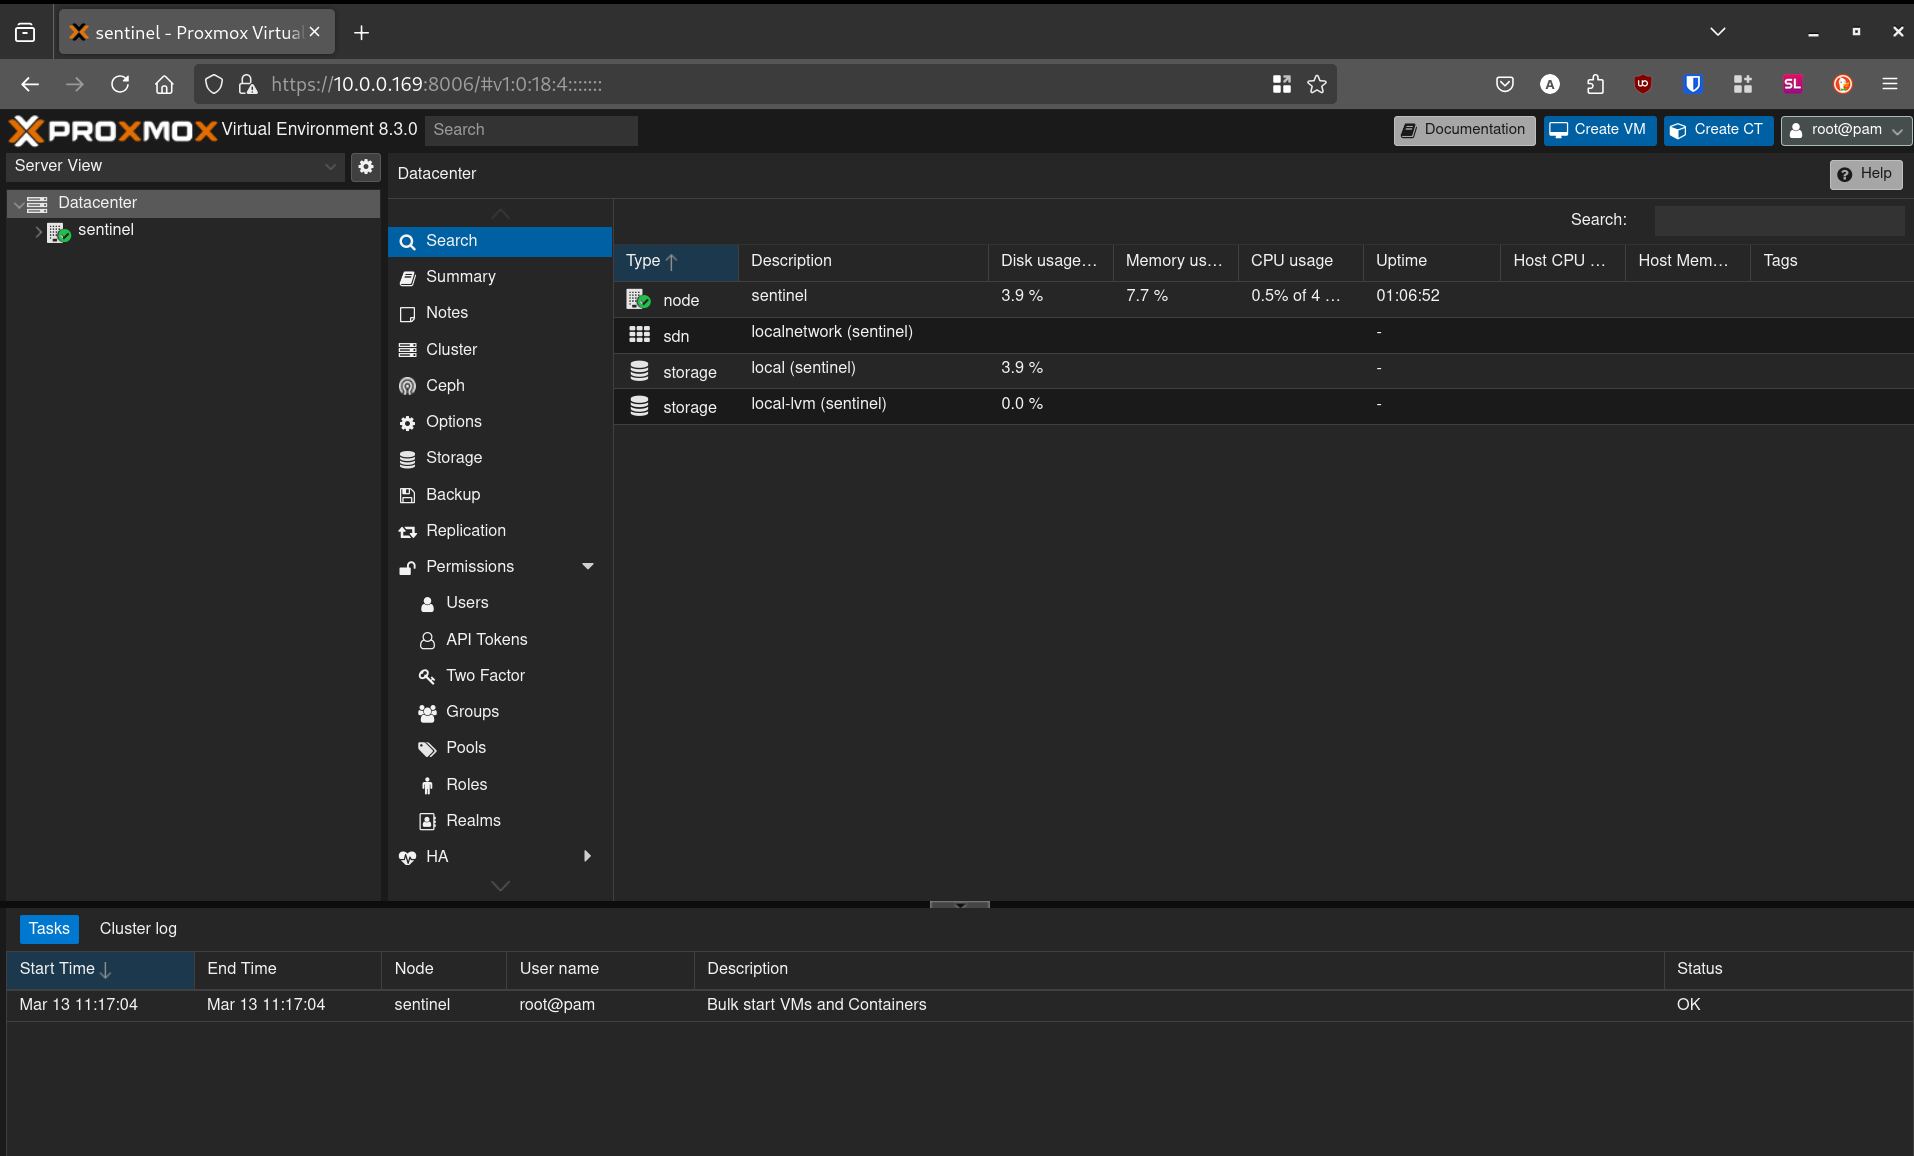
- Dismiss the subscription warning. 
You now have Proxmox VE installed with ZFS in a mirrored NVMe setup and ready for configuration!
Next Steps
- Add additional storage (ZFS pools, LVM, or directories).
- Set up VMs or containers.
- Configure networking for multi-interface setups.
- Enable updates and repositories.
Now, enjoy your Proxmox-powered homelab!